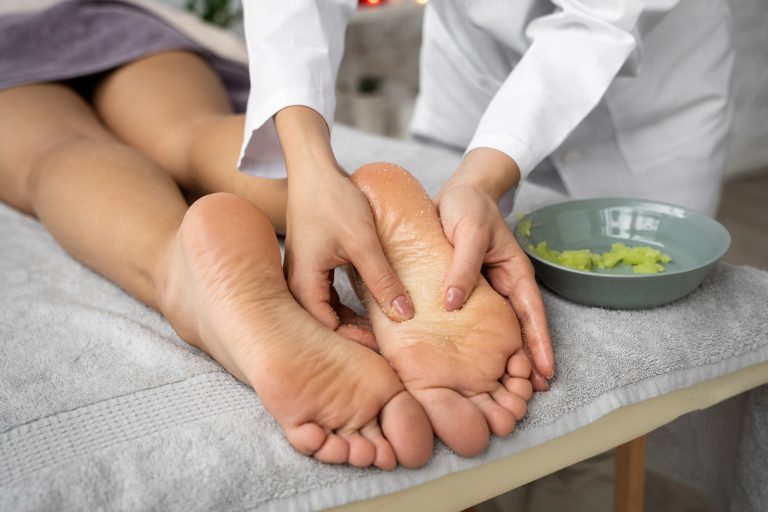
The big toes present the greatest technical challenge for a nail technician. The nail plate here is wider and thicker, often has a pronounced curve and an uneven micro-relief. This is why gel polish on big toes tends to streak, appear transparent near the sidewalls, or lose density already after the first layer. To achieve an even, saturated and long-lasting result, the application technique must be more precise than on the other toenails.
Why Big Toes Require a Special Approach
Big toenails are characterized by a thicker keratin structure, a pronounced longitudinal and transverse curvature, increased mechanical load during walking, and often micro-cracks or zones with different absorbency. As a result, pigment distributes unevenly, and the base coat may “sink” into depressions, leaving translucent areas.
Preparing the Nail Plate as the Basis for Dense Color
A smooth result starts not with color, but with preparation. For big toes it is especially important to carefully level the surface with a fine bit or buffer, remove keratinized particles along the sidewalls, dehydrate the nail plate, and, if necessary, apply primer to areas with reduced adhesion. The more uniform the surface, the more evenly the pigment will be distributed.
Leveling with Base: When It Is Necessary
If the nail plate has a pronounced curve or a wavy profile, a thin layer of standard base is not enough to compensate for micro-irregularities. In such cases, leveling with a flexible base is recommended: first a thin sliding layer, then a small bead in the center, gentle distribution with brush control of the apex, and mandatory sealing of the free edge. This creates an optically flat surface and prevents color from “sinking in.”
Streak-Free Pigment Application Technique
For dense color on big toes, work with thin, controlled layers. The first layer should be semi-transparent and rubbed in with minimal pressure. The area near the cuticle and sidewalls is detailed with a thin liner brush. The second layer provides full coverage and evens out the density. For difficult pigments, a third ultra-thin layer may be used. Excessive thickness does not increase saturation; instead, it causes flooding and uneven curing.
Sealing the Free Edge and Growth Zone
Big toes are exposed to the highest mechanical stress. Therefore, the free edge must be sealed with base, color and top coat. The cuticle line should remain thin, without excess product, and the top coat should be distributed with light leveling but without creating bulk in the center. This helps maintain color density and reduces the risk of chipping.
Common Mistakes That Reduce Coverag
Most often these include applying the first layer too thick, skipping leveling on strongly curved nails, working with a stiff wide brush in the sidewall area, insufficient dehydration, and incomplete curing caused by shadow from the big toe itself. Each of these factors can lead to streaks, “bald spots,” and uneven color.
Key Points About Applying Shellac on Big Toes
Big toes require especially thorough surface leveling.
Color density is achieved through thin, controlled layers.
Base leveling helps eliminate micro-relief.
Sidewalls are best detailed with a separate thin brush.
Sealing the free edge increases durability and visual uniformity.