The first thing a future nail technician runs into when choosing a nail extension course is a flood of conflicting advice. Some say: start with acrylic, it’s “the classic of the profession.” Others say the opposite: start with gel, because it “forgives beginners more mistakes.” In a short course lasting one to three days, it’s almost impossible to replay this choice without new costs in time and money, so it’s worth figuring out before signing up.
In this article, we’ll compare gel and acrylic not from the perspective of a client choosing a manicure, but from the perspective of someone just starting out on this career path: which material is easier to learn, roughly how much the start will cost, which mistakes happen most often, and why at MONLIS the first practical step is gel.
One point that often gets lost in comparisons “for the client”: choosing a material for training isn’t only about the result on the nails — it’s also about how many models you’ll have to redo before your hand “gets it,” and how many nerves that will cost you at the start. That’s why in this article we look at gel and acrylic through a beginner’s practical lens: learning curve, common mistakes, approximate budget, and the logic behind the training program.
Gel or Acrylic — What’s the Actual Difference (Short Version for Beginners)
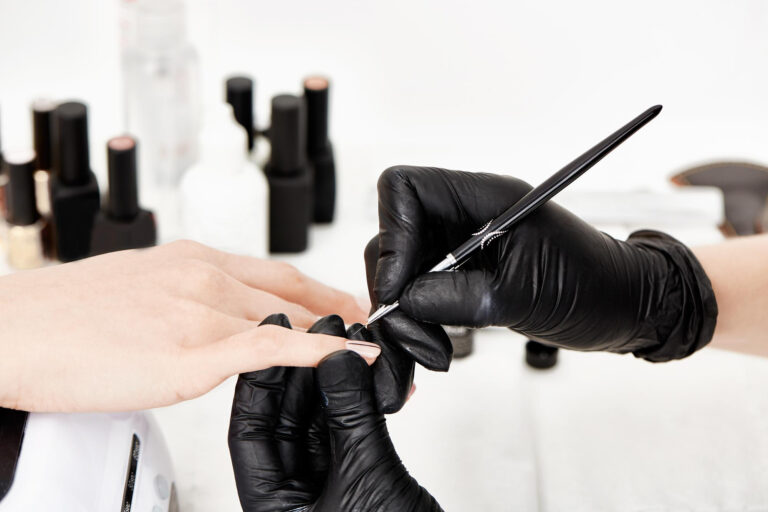
The main difference is how the material hardens. Gel is a ready-made product applied to the nail plate in layers and polymerized (that is, “cured”) under a UV or LED lamp. As long as the lamp isn’t on, the technician has time to calmly adjust the shape, layer thickness, or symmetry.
Acrylic works differently: powder (polymer) is mixed with liquid monomer right on the brush, and the resulting bead of material hardens in the air — with no lamp at all. This happens much faster than gel polymerization, so working with acrylic requires confidence and no unnecessary pauses.
More on the technology of gel polymerization under a UV lamp can be found in materials dedicated to the physics of the extension process — useful to understand before your first practical lesson.
What about polygel? It’s not a “third standalone material” but a hybrid: it combines the ease of working with gel (curing under a lamp, ability to correct the shape) with a density and strength closer to acrylic. In training, polygel is usually treated as a logical continuation once the basic extension technique is mastered — not as a starting point.
There’s another practical difference worth keeping in mind at the learning stage: the application method. Gel is applied with a brush layer by layer, and each layer can be individually adjusted before curing — giving more “checkpoints” during the work. Acrylic is shaped into a bead directly on the nail, and once the material starts to harden, there are far fewer moves left to fix the shape. For a beginner, that means a different number of “chances to make a mistake” within a single model.
The main differences can be summed up briefly in the table below — handy for a quick refresher before choosing a course.
| Criterion | Gel | Acrylic |
|---|---|---|
| How it hardens | Under a UV or LED lamp | In the air, right after mixing |
| Time to correct the shape | A few minutes before curing | Limited — the bead hardens quickly |
| Smell during work | Minimal | Noticeable, ventilation required |
| Typical difficulty for beginners | Lower | Higher |
| Logical next step | Acrylic or polygel | Polygel as a hybrid technique |
What’s Easier for a Beginner to Learn — Gel or Acrylic
For an absolute beginner, gel usually turns out to be the more forgiving material. Since it only hardens under the lamp, the technician has a few minutes to even out the nail’s architecture, smooth out unevenness, or check the symmetry of both hands — and only then “lock in” the result by curing it. That’s especially valuable while motor skills and a sense of proportion are still developing.
Acrylic requires a different skill: a sense of timing. The bead of material starts to thicken right after mixing powder and monomer, so the shape needs to be laid down quickly and decisively — it’s harder to adjust on the fly than with gel. That doesn’t mean acrylic gives a worse result, just that its learning curve is steeper.
Other industry sources follow similar advice for beginner technicians: for a first experience with extensions, gel is generally seen as the safer start, while acrylic is a technique worth adding once you already have a confident base.
“Can I just start with acrylic if I want to get to clients faster?” Technically, yes, and some technicians do choose that path. But it’s worth being honest with yourself: a faster working pace with acrylic at the start usually means more redoing — and, as a result, more time spent learning in the long run, not less.
There’s also a psychological factor rarely discussed openly. The first models are always stressful: hands shake, time pressure builds, and you want it to look good on the first try. A material that allows a pause to think reduces that stress simply by existing — which is why most training programs aimed at absolute beginners build the sequence “gel first, everything else after.”
Common Beginner Mistakes With Each Material
Each material has its own set of “growing pains” that almost always show up on the first models. Knowing about them in advance isn’t about fear — it’s about not panicking when something doesn’t go according to plan during your first practice, and understanding that it’s a normal part of learning, not a sign you’re “not cut out for the job.”
With gel, the most common issues are:
- under-curing (incomplete polymerization) of layers, when the lamp didn’t reach the full volume of material;
- too thick a layer, which makes the gel cure poorly and stay tacky longer;
- insufficiently thorough nail plate preparation before application, which can affect how well the material bonds to the nail.
That’s why nail preparation before extension — dehydration and primer — isn’t a formality, but a step that directly affects the quality and neatness of the finished work.
With acrylic, the most common issues are:
- an incorrect powder-to-monomer ratio, which makes the bead of material either too runny or too thick and hard to work with;
- working without proper ventilation or extraction — acrylic gives off a fairly sharp, lingering smell while it’s being mixed and shaped;
- rushing while sculpting the shape, which remains a typical challenge specifically in the first weeks of practice.
“Is this harmful for me as a technician if I work with it every day?” — Working with acrylic requires mandatory ventilation or extraction at the workstation because of the fumes released during mixing; this is a standard requirement for setting up a workspace, not a reason for concern as long as the room is properly equipped.
It’s also worth remembering that most of these mistakes aren’t critical and can be fixed: a gel layer that’s too thick can be filed down and reworked, a botched acrylic ratio can be removed and redone. The real problem isn’t the mistake itself, but repeating it without understanding the cause — so early in training it’s worth spending time not just repeating the motion, but analyzing why a particular model didn’t turn out perfectly.
Other industry sources offer their own take on choosing a material based on nail type — useful as additional context once the basic technique is already mastered and the question shifts to picking the right material for a specific client.
Cost of Starting Out: Materials, Tools, and the First Course
When planning a starting budget, it helps to split the costs into two parts: one-time training costs, and the later costs of your own equipment, which you’ll only need once the course is over and you start working with real clients. These are different budget lines, and mixing them up is a common beginner mistake when trying to sum up “how much it costs to become a nail technician” as a single number.
A starter kit for gel usually includes base and building gels, a UV/LED lamp, brushes, tips or forms for extensions, and wipes for removing the sticky layer. For acrylic, the basic kit is powder, monomer, a special brush, a dappen dish (a container for the liquid), and — essential — means of ventilating the workspace. The exact cost of equipment varies by brand and kit size, so it’s best to check the current price list of a specific materials supplier.
As for the training itself — the “Nagelverlängerung” course at MONLIS runs for one day (10:00 to 18:00), costs €750, and is built on a ratio of roughly 90% practice to 10% theory. The main advantage for beginners: all materials are provided for the duration of the course, so there’s no need to separately buy a full starter kit before even knowing whether this profession is the right fit. A certificate is issued upon completion.
“Are materials included in the course price?” Yes — the school provides everything needed for the training day, and there’s no need to buy anything extra beforehand.
That removes one of the biggest financial dilemmas for a beginner: there’s no need to invest upfront in a full personal kit for both techniques before knowing which one suits you better. First comes the course and practice on a model with materials provided, and only afterward — an informed purchase of your own equipment for whichever technique turns out to be “yours.”
Which Material Do Clients in Munich Choose — And Why That Affects Your Choice as a Technician
Demand for a specific material in Munich and Bavaria varies depending on the season, clients’ age group, and personal preferences — there’s no universal figure here, and any specific statistic without an official source would be a guess, not a fact. One general trend worth keeping in mind: clients increasingly come in with a specific request (“I want it light and natural, like gel” or “I want strong acrylic that lasts a long time”), so it’s useful for a technician to understand both materials even if she specializes mainly in one of them.
How long the result lasts also depends on the material and on aftercare — you can read more about that in the article on how long gel and acrylic coatings last.
“Is it enough to know just one material to work with clients?” At the start, being confident with one material is entirely enough. A second technique is usually added once you already have a steady flow of clients and hands-on experience — not right after your first course.
For the Ukrainian- and Russian-speaking diaspora in Munich and Bavaria, an additional factor is often personal contact with a technician who speaks “their own language” — being able to explain what they want without a language barrier. That’s not directly tied to material choice, but it does mean an established client base often trusts a technician’s taste and recommendations, which makes confident command of at least one material more important than a surface-level familiarity with both.
Why MONLIS Starts With Gel (And What That Gives Beginners)
The logic behind the school’s training program is simple: gel gives more time to fix a mistake before the result is locked in, which reduces stress and the number of redos on the first models. That’s why the basic extension course is built around gel — as a safer, more predictable starting point, after which it’s natural to add acrylic or polygel.
The course format matches this approach: one day, taught by a technician with years of hands-on experience, mostly hands-on work on a model, and an official certificate upon completion. According to the school, more than 300 graduates have already completed the course, and the team has worked in the beauty industry for 15 years.
This doesn’t mean acrylic or polygel are “unnecessary” techniques. On the contrary — after a confident foundation in gel, they’re learned faster, because the basic skills of nail shaping, plate preparation, and extension architecture are already in place. It’s more a question of sequence than a once-and-for-all choice.
You can sign up on the “Nail Extension” course page — it also lists current dates and terms.
Gel and acrylic aren’t “better” or “worse” — they’re two tools with different learning curves. For an absolute beginner, gel is usually the more practical start: it gives time to fix mistakes before the result is locked in and reduces the number of redos on the first models. Acrylic or polygel then become a logical, natural continuation once the basic technique is confidently mastered.
The main takeaway from this comparison: there’s no single “right” answer for everyone — only the answer that fits your own learning pace, starting budget, and how quickly you want to reach your first clients. If in doubt, choosing the material that gives you more room to fix mistakes is usually the safer choice than picking whichever one seems “more prestigious” or “more classic.”
If you’re still deciding on the profession, it’s worth first reading about how to become a nail technician in Munich. And if you already have the basics down and want to expand your skills further, the logical next step is the “Trending Nail Designs” course.
You can sign up for the first step — the “Nagelverlängerung” course — at schule.mon-lis.de/schulungen/nagelverlangerung.
This article is for informational purposes only and does not replace consultation with a doctor or specialist.